# Mastercard Passkeys in Mobile Native Apps for Card on File
source: https://developer.mastercard.com/mastercard-checkout-solutions/documentation/tutorials-and-guides/scof-passkey-mobile-integration-tutorial/index.md
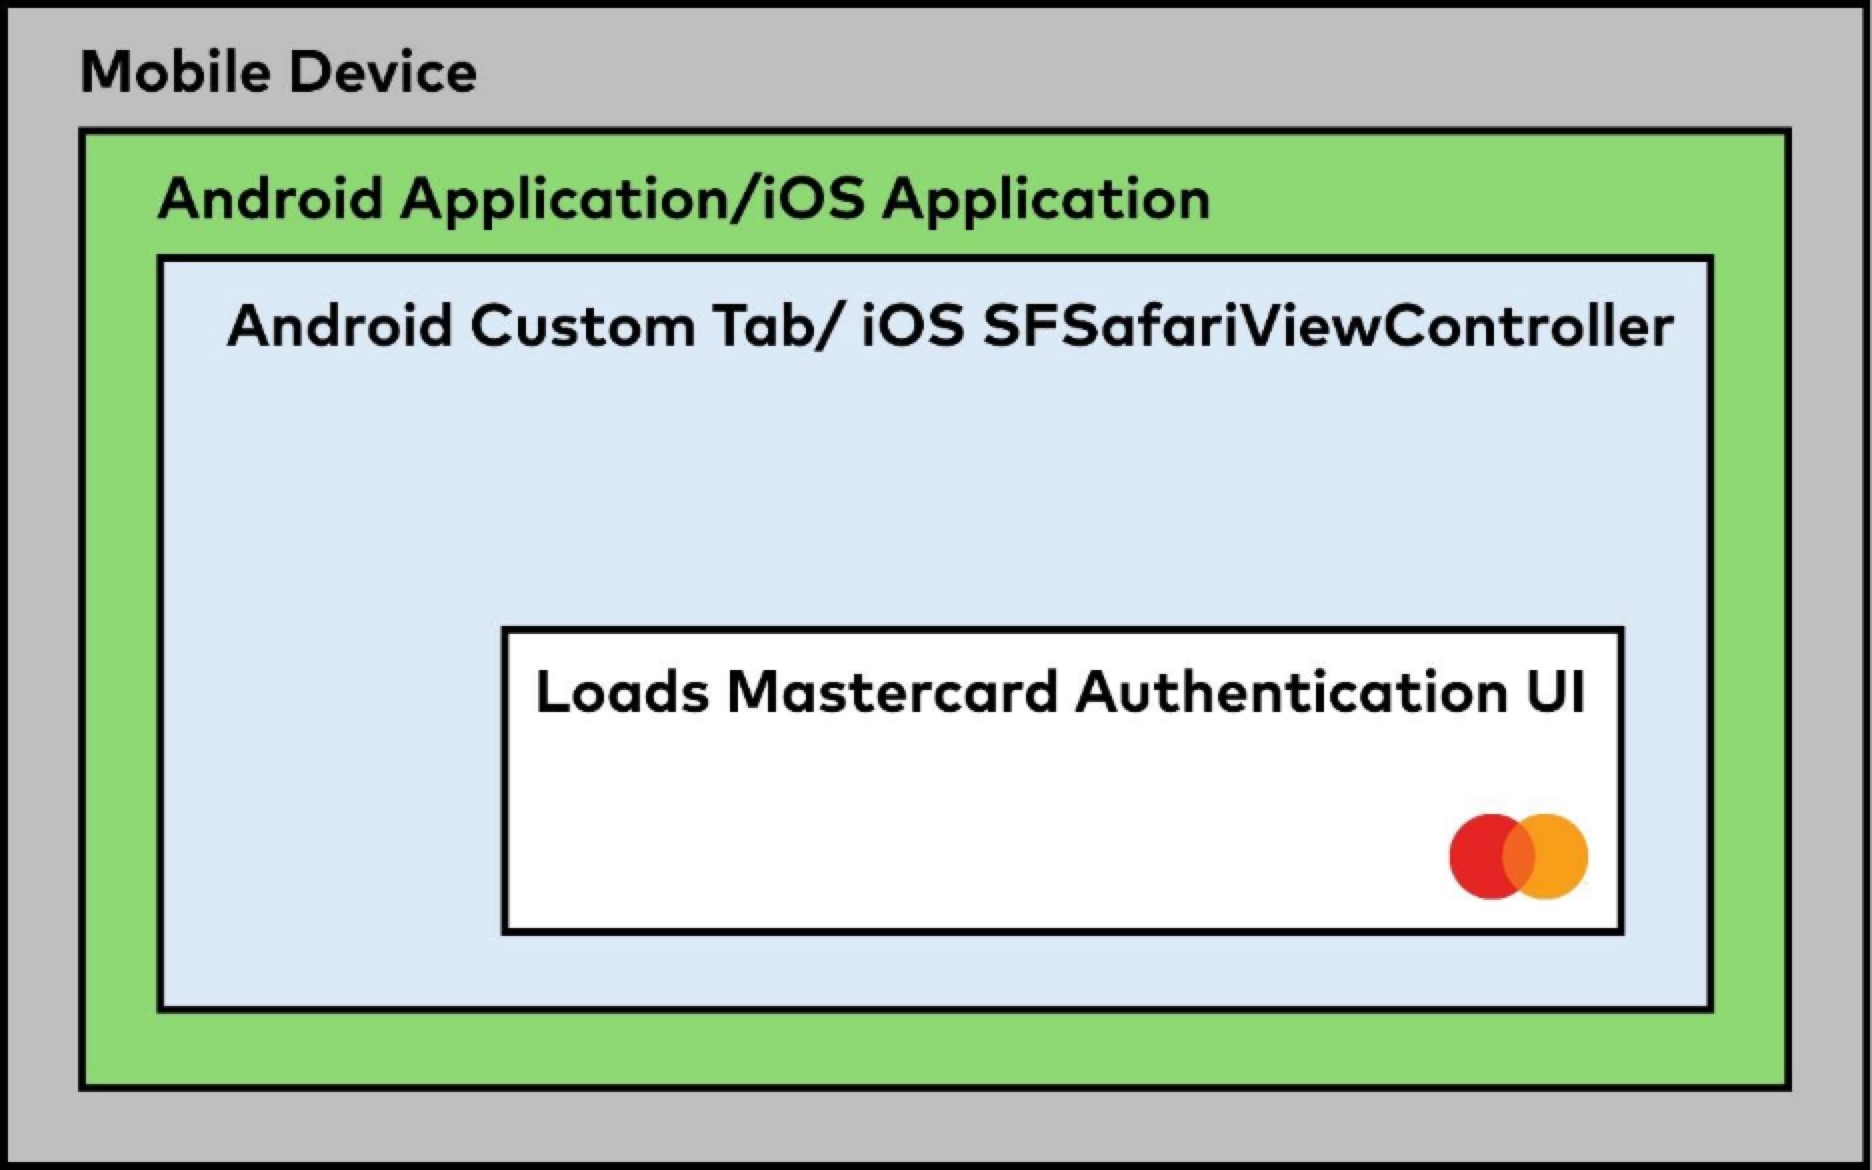
Secure card-on-file customers can seamlessly invoke Mastercard Payment Passkeys from their mobile app using the [Authentication UI URL](https://developer.mastercard.com/mastercard-checkout-solutions/documentation/tutorials-and-guides/integrate-apis-scof-tutorial/index.md). This ensures smooth passkey enrollment and authentication while maintaining a consistent user experience across platforms and adhering to best practices for native integration.
### Android Implementation {#android-implementation-br}
Integrate your mobile native app on an Android device based on Mastercard's recommended solution
[See Android implementation details →](https://developer.mastercard.com/mastercard-checkout-solutions/documentation/tutorials-and-guides/scof-passkey-mobile-integration-tutorial/index.md#android-implementation)
### iOS Implementation {#ios-implementation-br}
Integrate your mobile native app on an iOS device based on Mastercard's recommended solution
[See iOS implementation details →](https://developer.mastercard.com/mastercard-checkout-solutions/documentation/tutorials-and-guides/scof-passkey-mobile-integration-tutorial/index.md#ios-implementation)
## Architectural Solution Overview {#architectural-solution-overview}
## Android Implementation {#android-implementation}
The mobile app must launch the **Authentication UI URL** using an Android **Custom Tab** when the consumer initiates checkout within their Android app
The following representation shows the consumer's Passkey authentication during checkout on merchant's mobile app in their Android device.

Follow the sequence outlined in [Create Passkey](https://developer.mastercard.com/mastercard-checkout-solutions/documentation/token-authentication/secure-card-on-file/by-mastercard/authentication-with-passkey/create-passkey/index.md) on the Mastercard Checkout Solutions
documentation. After receiving the **Authentication URL** from Mastercard Checkout Solutions, ensure that your mobile app launches this URL within an Android Custom Tab.
Mastercard recommends that customers refer to the official Android documentation for guidance on implementing Custom Tab launches, as well as configuring the callback and close handling.

### Prerequisites {#prerequisites}
* You must have a native Android application.
* Ensure that the `androidx.browser` dependency is included in your app's **build.gradle** file.For more information, refer to the official [AndroidX Browser release notes](https://developer.android.com/jetpack/androidx/releases/browser).
### 1. Create the Custom Tab Intent {#1-create-the-custom-tab-intent}
This function builds a **CustomTabsIntent** configured to launch as a bottom sheet of a specific height.
* Kotlin
```kotlin
fun getCustomTabsIntent() : CustomTabsIntent {
// Provide customization if required by the application.
return CustomTabsIntent.Builder()
// Hide/Disable unnecessary browser features
.setDownloadButtonEnabled(false)
.setBookmarksButtonEnabled(false)
.setShareState(CustomTabsIntent.SHARE_STATE_OFF)
.setInstantAppsEnabled(false)
.setBackgroundInteractionEnabled(false)
// Set the initial height of the Custom Tab to appear as a bottom sheet
.setInitialActivityHeightPx(heightInPx, CustomTabsIntent.ACTIVITY_HEIGHT_FIXED)
.build()
}
```
More details about this component can be found in the Android [CustomTabsIntent](https://developer.android.com/reference/androidx/browser/customtabs/CustomTabsIntent) reference.
### 2. Launch Custom Tab {#2-launch-custom-tab}
With the **CustomTabsIntent** builder ready, you can launch the URL from either the traditional View system or Jetpack Compose.
#### 2.1. Launching from Views (Activity / Fragment) {#21-launching-from-views-activity--fragment}
Within an Activity or Fragment, call this method to open the specified URL.It leverages the `getCustomTabsIntent()` helper function to apply your defined customizations.
* Kotlin
```kotlin
/**
* Launches a URL in a Chrome Custom Tab from an Activity or Fragment.
*/
fun launchChromeCustomTabs(url: String) {
val qualifiedUrl = Uri.parse(url)
// Invoke the Custom Tabs intent to open the URL in a Chrome Custom Tab
getCustomTabsIntent().launchUrl(context, qualifiedUrl)
}
```
#### 2.2. Launching from Compose {#22-launching-from-compose}
This function is a **Composable** that can be invoked within your Jetpack Compose UI to launch the Custom Tab.
* Kotlin
```kotlin
/**
* Launches a URL in a Chrome Custom Tab from an Activity or Fragment.
*/
fun launchChromeCustomTabs(url: String) {
val qualifiedUrl = Uri.parse(url)
// Invoke the Custom Tabs intent to open the URL in a Chrome Custom Tab
getCustomTabsIntent().launchUrl(context, qualifiedUrl)
}
```
For more advanced implementations, consider using a **wrapper class** to encapsulate the Custom Tab logic.
This approach offers a unified interface for launching the tab and managing callbacks, helping to prevent potential lifecycle conflicts between Activities and Composables.
### 3. Returning to your App (Callback) {#3-returning-to-your-app-callback}
To return to your app from a Custom Tab, the web page must trigger a navigation to an [Android Deeplink](https://developer.android.com/training/app-links/create-deeplinks#types-deep) that your app is configured to handle.
Common approaches include:
* [App Links](https://developer.android.com/training/app-links/about) : Standard `http://` or `https://` links that resolve directly to your app.
* **Custom Schemes** : Unique URIs such as `myapp://callback`.
* [Chrome Intents](https://developer.chrome.com/docs/android/intents) : A specific `intent://` format.
Note:
* Chrome Intents may not be supported by non-Chromium-based browsers such as Firefox.
* Regardless of the method used, it's critical to follow [Android's security guidelines for Deeplinks](https://developer.android.com/privacy-and-security/risks/unsafe-use-of-deeplinks) to prevent potential vulnerabilities.
## iOS Implementation {#ios-implementation}
The mobile app must launch the **Authentication UI URL** using an iOS **SFSafariViewController** when the consumer initiates checkout within their iOS device.
The following representation shows the consumer's passkey authentication during checkout on merchant's mobile app in their iOS device.

*Face ID® and the Apple-owned graphic symbols depicted in the UX screen are trademarks of Apple Inc.*
*SFSafariViewController does not share cookies across apps or with the Safari browser on the device.As a result, consumers currently need to create a new Mastercard Passkey in each participating mobile application.A solution to eliminate the need for recreating the passkey is planned for a future release.*
Follow the sequence outlined in [Create Passkey](https://developer.mastercard.com/mastercard-checkout-solutions/documentation/token-authentication/secure-card-on-file/by-mastercard/authentication-with-passkey/create-passkey/index.md) on the Mastercard Checkout Solutions documentation. After receiving the **Authentication URL** from Mastercard Checkout Solutions, ensure that your mobile app launches this URL within an iOS **SFSafariViewController**.
Mastercard recommends that customers refer to the official iOS documentation for guidance on implementing SFSafariViewController launches, as well as configuring callbacks and handling closure.

### 1. Configure Universal Link {#1-configure-universal-link}
Although you can use custom URL schemes, Apple strongly recommends using **Universal Links** because they provide stronger security. For more information, see the Apple guide [Defining a custom URL scheme for your app](https://developer.apple.com/documentation/xcode/defining-a-custom-url-scheme-for-your-app).
To configure Universal Links:
1. **Create a domain association** by following the steps in the Apple documentation. This involves uploading a file to the root of your domain, which Apple uses to verify the link between your app and the website.
2. **Complete the Universal Links setup** by following the Apple guide, [Supporting associated domains](https://developer.apple.com/documentation/xcode/supporting-associated-domains) for modifying your app code to support Universal Links, including where and how to implement the necessary changes.
### 2. Create and Launch SFSafariViewController {#2-create-and-launch-sfsafariviewcontroller}
A **SafariViewController** is a `UIViewController` that loads web pages in a sandboxed environment and allows for customizable presentation. For more details, refer to the Apple reference for [ASFSafariViewController](https://developer.apple.com/documentation/safariservices/sfsafariviewcontroller).
Below is a basic code snippet to create and present a Safari View Controller:
* Swift
```Swift
func openSafariViewController(url: URL) {
// Create a Safari View Controller with the provided URL
let safariVC = SFSafariViewController(url: url)
// Set the delegate if you need to detect when the view controller is closed
safariVC.delegate = self
// Present the Safari View Controller
self.present(safariVC, animated: true)
}
```
### 3. Redirection to App / Callback {#3-redirection-to-app--callback}
To return from a webpage loaded in a **Safari View Controller** , a special navigation called a **Universal Link** (configured in Step 1) is required. This allows the URL to be passed back to the native application via the `AppDelegate`.
The `AppDelegate` code was already configured in Step 1 to handle the Universal Link. It should resemble the following snippet:
* Swift
```Swift
func application(
_ application: UIApplication,
continue userActivity: NSUserActivity,
restorationHandler: @escaping ([any UIUserActivityRestoring]?) -> Void
) -> Bool {
guard userActivity.activityType == NSUserActivityTypeBrowsingWeb,
let incomingURL = userActivity.webpageURL else {
return false
}
MCAuthentication.shared().responseFromSafariVC(incomingURL)
return true
}
```
The response URL is now sent and validated, allowing the flow to proceed.
* Swift
```Swift
@objc func responseFromSafariVC(_ incomingUrl: URL) {
guard incomingUrl.absoluteString.starts(with: "[MyCallbackUrl]") else {
// Not our callback
return
}
self.dismiss(animated: true)
// TODO: Validate & sanitize incomingUrl
// TODO: Process incomingUrl and continue the flow
}
```
### 4. Close Safari View Controller {#4-close-safari-view-controller}
The user can close the **Safari View Controller** at any point during the process. In such cases, you need to determine how to proceed, as the transaction or workflow on the webpage may have completed.
To detect when the user closes the Safari View Controller, implement the appropriate **delegate protocol**.
* Swift
```Swift
extension MCAuthentication: SFSafariViewControllerDelegate {
func safariViewControllerDidFinish(_ controller: SFSafariViewController) {
// TODO: Clean up and verify the process status
}
}
```